DIY Card Making Ideas for Kids
Find a babysitter or babysitting job, or stay up to date with the latest childcare tips!
Get started today for free.
Get startedThis card making DIY is a great craft for kids and the perfect way to create a personalized gift for loved ones. We’ve created two pop-up card examples that you can recreate with your own message. See how easy they are to make with our step-by-step guide below.
These cards can be a great way for kids to show appreciation to those in their lives. Or, it can be a fun way to stay connected with grandparents or family that they may not be able to see often!
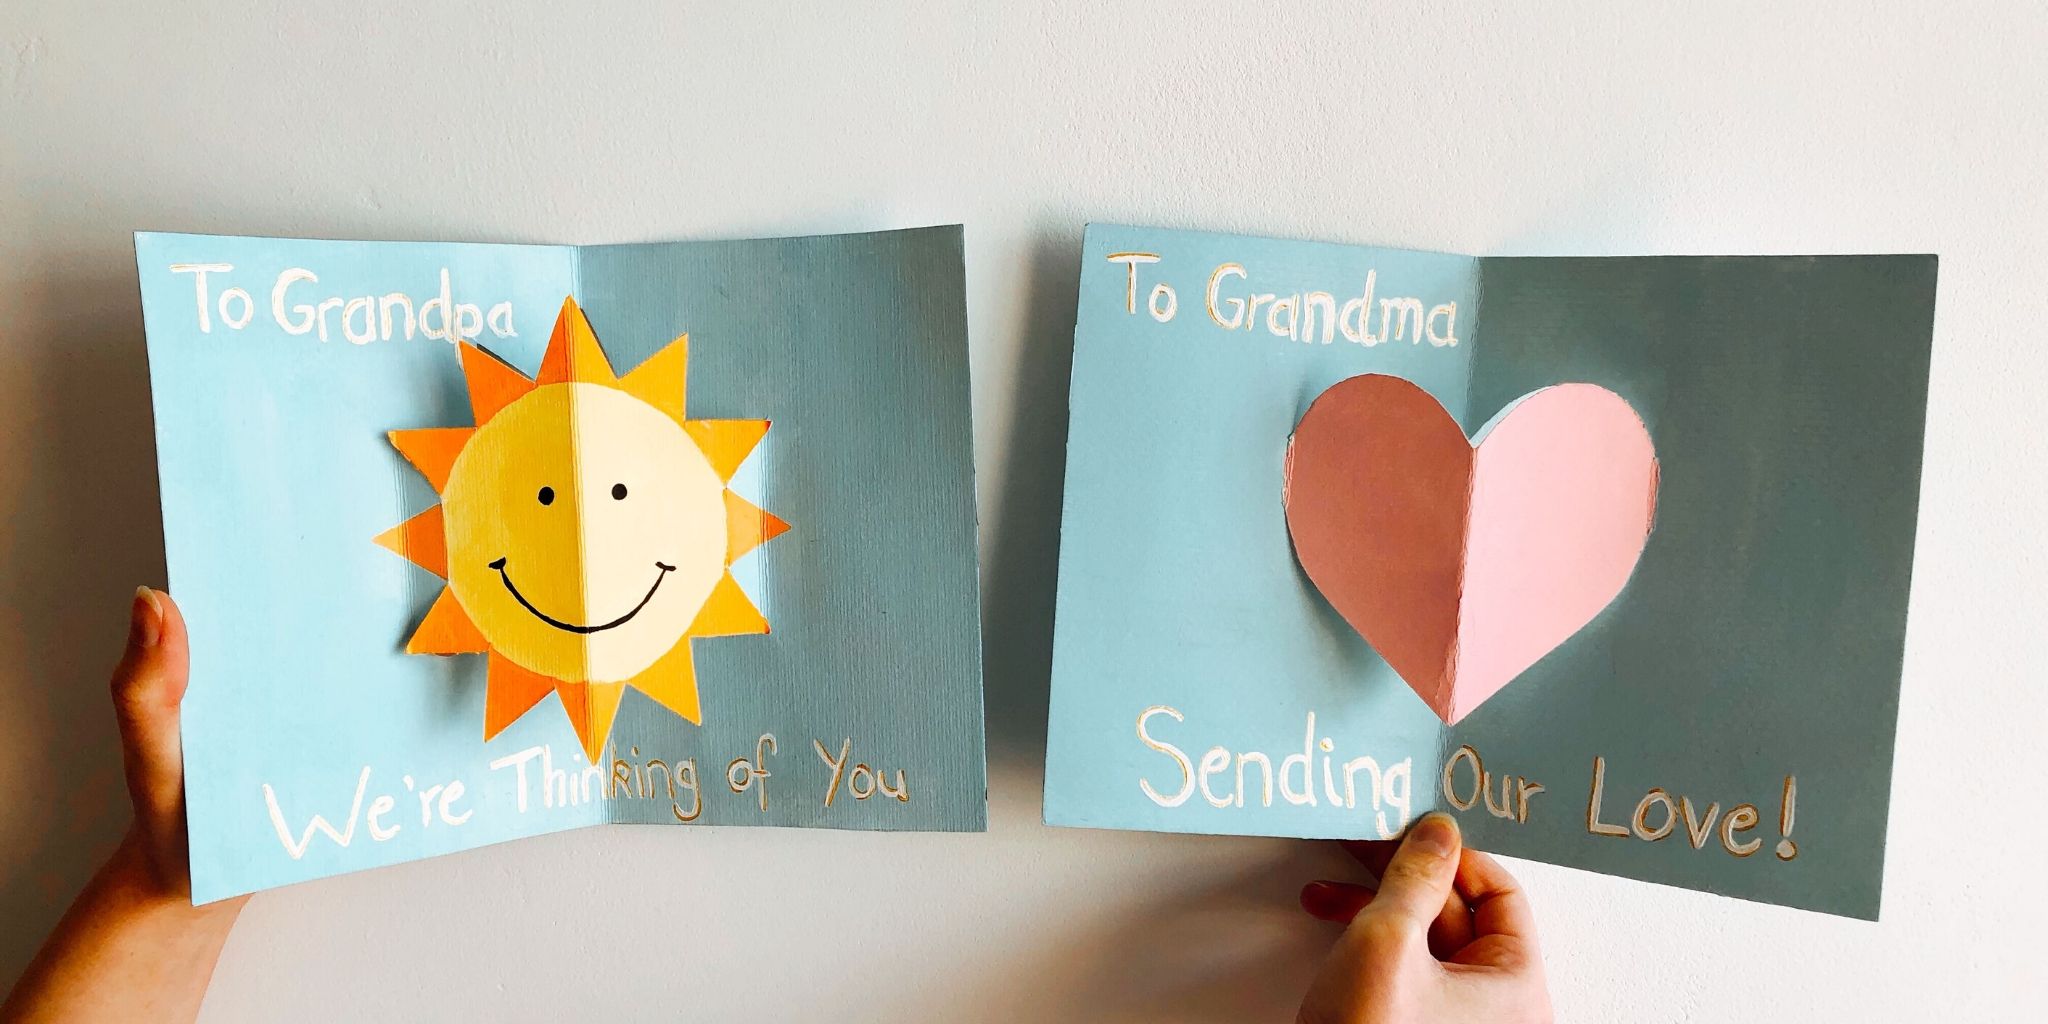
To give you some card making ideas, we’ve created two unique pop-up card designs: a love heart and a happy sun that you can recreate with your own personalised message.
Creating a Diy Popup Card with Kids: The Steps
Step One
To make a pop-up card, the first thing you’re going to need is a piece of paper that you can fold in half to form the basis of the card. We used 400g acrylic paper, but you can use regular scrapbooking card (whatever you’ve got lying around at home will do!).
Next, you need to lightly outline of the shape you want to create as your pop-up design. It is important to only draw half of your design, so that once you’ve cut the design out and unfolded the card, you’ll have a full-shaped pop-up. We created half a heart shape and half a sun!
Important note: Make sure to leave a section of your design uncut. We marked a section of roughly 2cm on each of our designs to be left uncut. This is essential to creating your pop-up design!

Step Two
Now it’s time to grab a pair of scissors and cut along your design. You can carefully cut along the outline you’ve traced, making sure to leave a section of approximately 2cm uncut.

Step Three
Once you’ve cut out your design, you can fold it back along the section you’ve carefully left uncut. Firmly press down along the fold.

Step Four
And now for the exciting part! You can push your design forward so that it “pops out” of the card. Practice opening and closing your card to test whether you’ve successfully created your pop-up card.

Step Five
It’s time to get creative! We chose to use acrylic paint to add some colour to our pop-up cards, but you can use coloured pencils, markers, crayons or whatever you’ve got at home to add a splash of life to your unique card.

Step Six
Don’t forget the little details! We decided to paint our love-heart design pink, and chose yellow and orange for our sun. Because we had to leave a section of the pop-up uncut, we went back in and added an extra orange triangle to our sun to give the illusion that the entire sun was popping out of the card!

Step Seven
We’re almost there! Now that we have painted our pop-up cards, they’re ready for some personalised messages and finishing touches. You can ask your children to draw or write a message for their grandparents to let them know how much they’re loved.

Step Eight
And here we have it! Two DIY pop-up cards that you can share with your grandparents to let them know you’re thinking of them during this period of self-isolation. Let’s bring a smile to their faces!

Did you enjoy this DIY? We’d love to see your own DIY pop-up cards and your grandparents’ reactions! Be sure to share your designs with us @babysits
For more fantastic ideas, take a look at our other DIYs for fun activities and crafts.


